
Account Customers in SkipTrak are customers that have an account with you and pay for your services on an agreed date each month.
Step 1
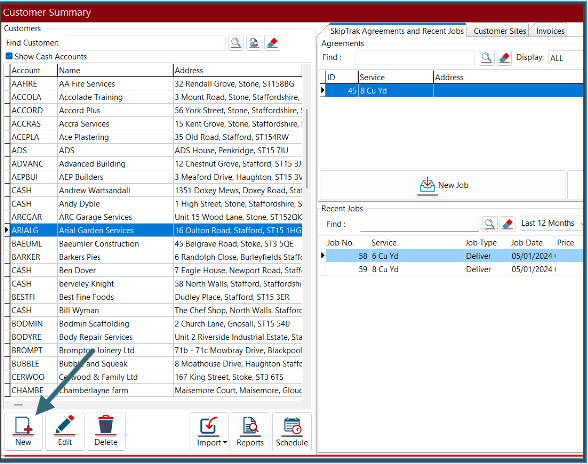
• Click “Customers” from the Main Menu

Step 2
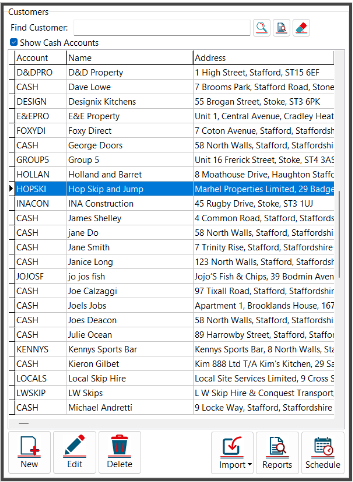
• From the “Customers Summary”, where you will see your existing customers. Click the “New” button. This will start a new record.
Step 3
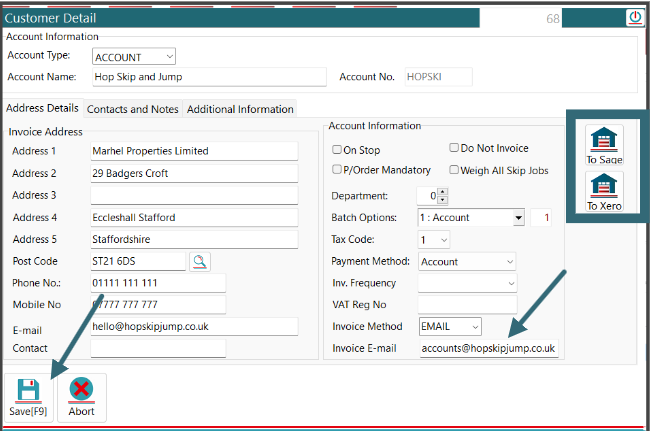
• Complete the “Customer Details”. Enter the customer details starting with account name. This will also populate account number using the first 6 digits of the account name.
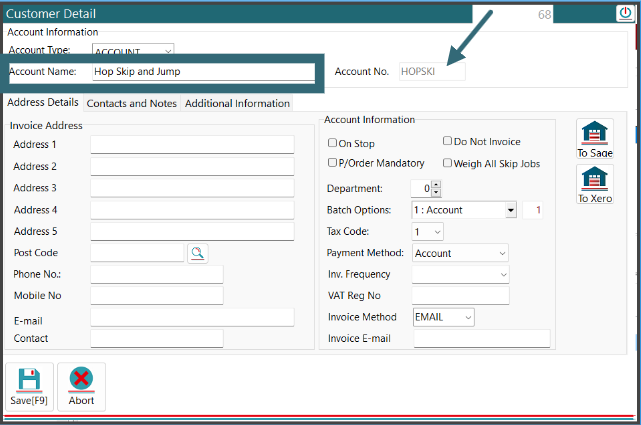
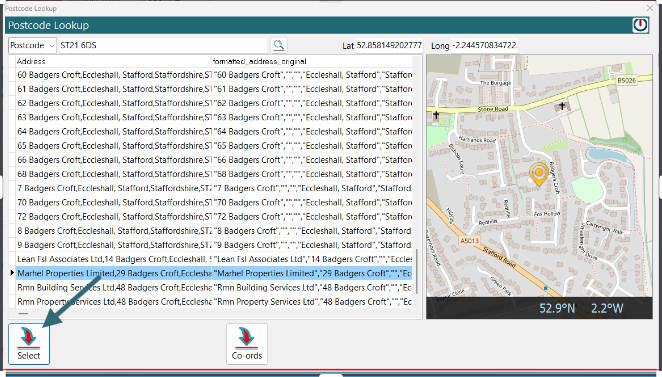
• Enter the “Post Code” of the new customer and click on the “Lookup” button.

• You will now be able to choose the correct address for your customer and then click the “Select” button.
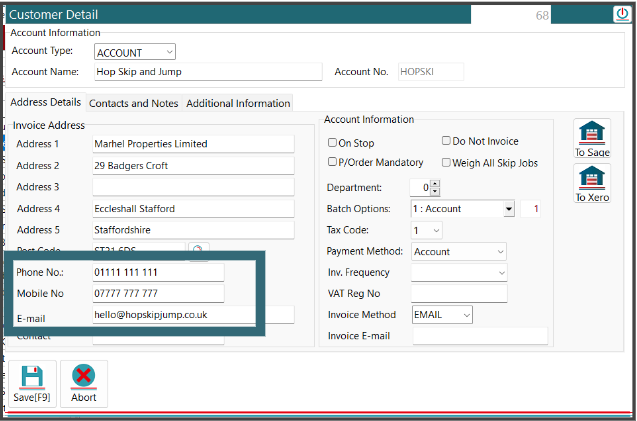
• You can see that the address has now been populated for you.

• You can now add the customers phone numbers and email address.
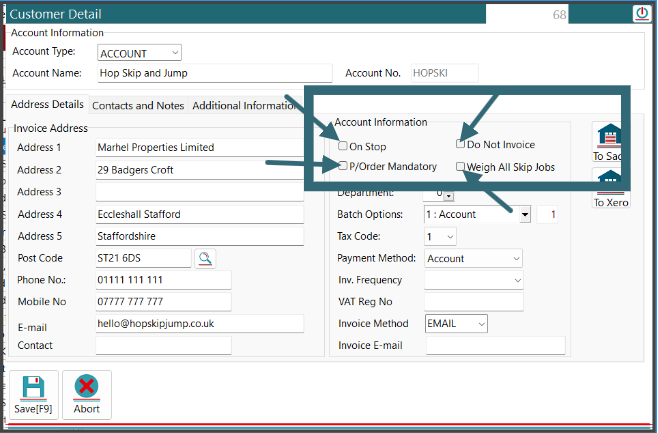
• I will now explain the account information fields highlighted.
If the following fields are ticked,
On Stop – Is if the customer’s account has been put on stop. This will prevent adding new jobs.
Do Not Invoice – Will not invoice the customer. An example of this might be that it is a sister company or part of a group.
P/Order Mandatory – This will prevent the saving of a job if there is no purchase order number.
Weigh All Skip Jobs – Is if the customer needs a weight for all jobs once they have been completed.
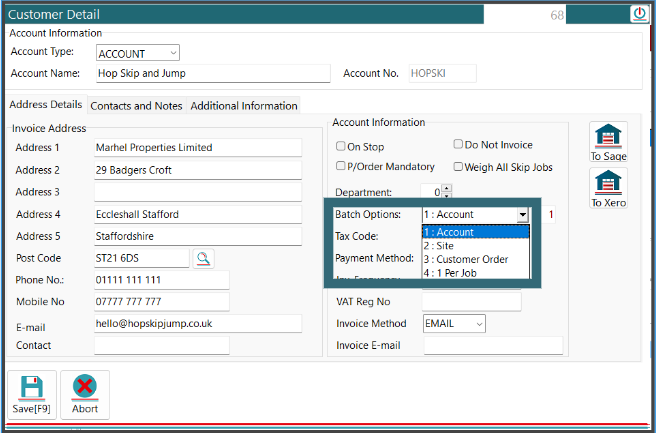
• “Batch Options” is how the customer wants the invoice sending. For Account customers this is usually left as “Account”.
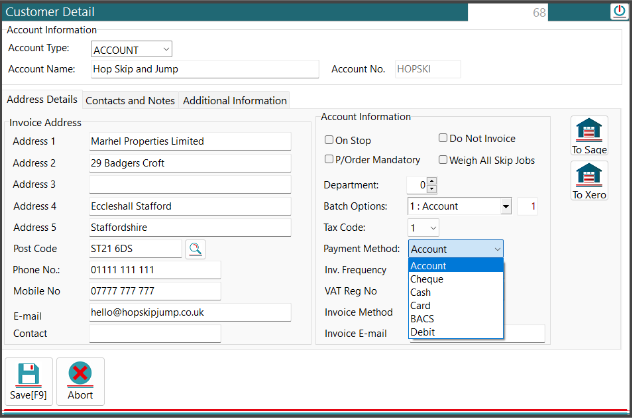
• “Payment Method” is the section where you can select the preferred payment for the customer.
• “Invoice Method” is the section where you can select the preferred method the customer would like to receive their invoice.
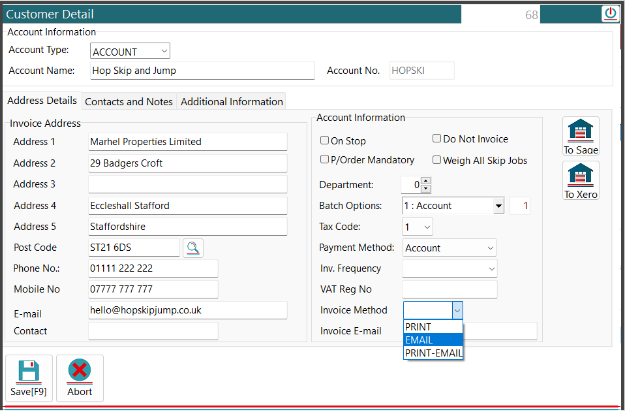
• “Invoice Email” is the section where you can add in the email address of where the customer would like their invoices sending to. If this field is left blank, then the invoice will be sent to the customer contact email on the left. Once you have populated all the customer details, you have the option to send the customer details through to your financing system. Then Click on the “Save” button.
• You can now see that your new customer has been successfully added and is highlighted in blue.
Post your comment on this topic.