
An agreement is where you are agreeing with the customer to provide a service for them at a location of their choosing.
Step 1
• Click the “Customers” button from SkipTrak’s main menu.

Step 2
• From the “Customers Summary”, select the customer you would like to add the agreement to. The customers account will then highlight in blue.

Step 3
• Click on the “New Agreement and Job” button.

• You will see that the “Agreement Details” page is now displayed.
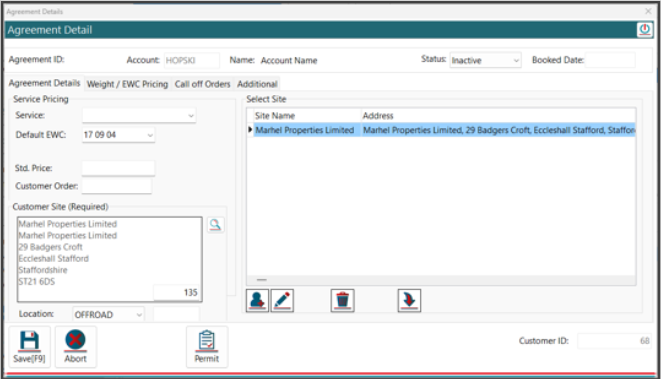
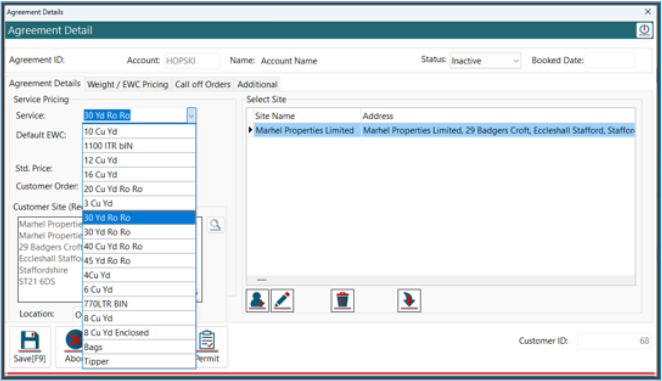
• Complete the “Agreement Details”, starting with Entering the “Service” from the dropdown. For this example we have selected 30 Yard Ro Ro.
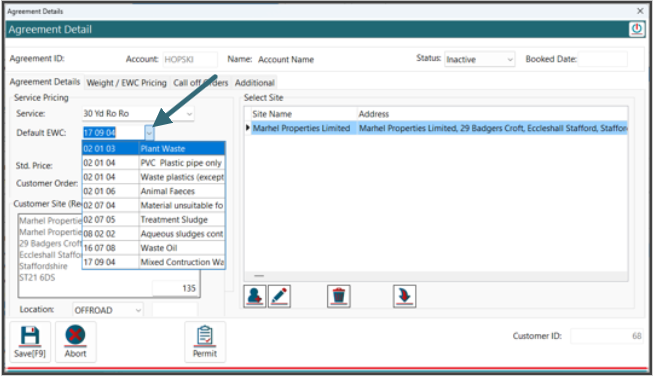
• Now click on the dropdown for the “Default EWC” and select the correct one that is required.
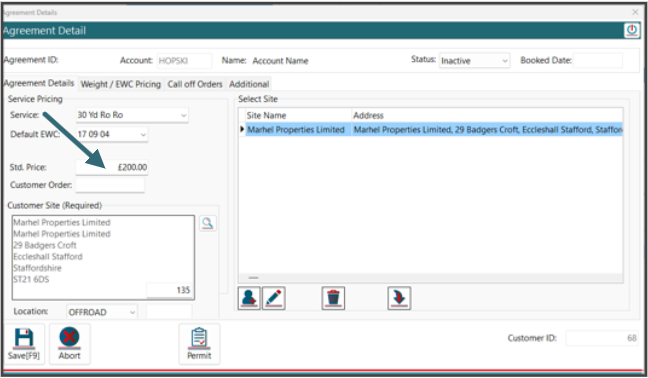
• The “Standard Price” should have been populated for you but if the price is different, you can also update it here.
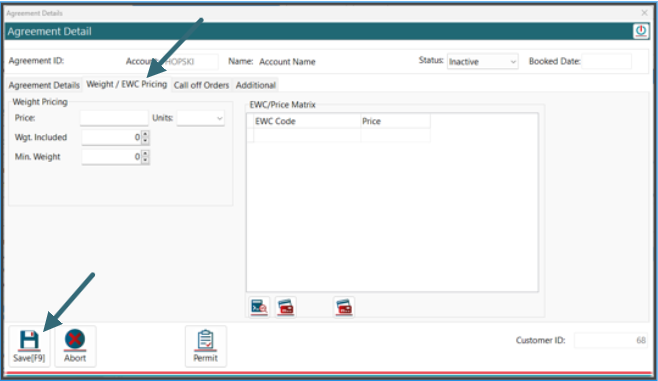
• On the “Weight EWC Pricing” tab, you can add in a Weight price if required. Once you are happy with the information you have entered click on the “Save” button.
Step 4
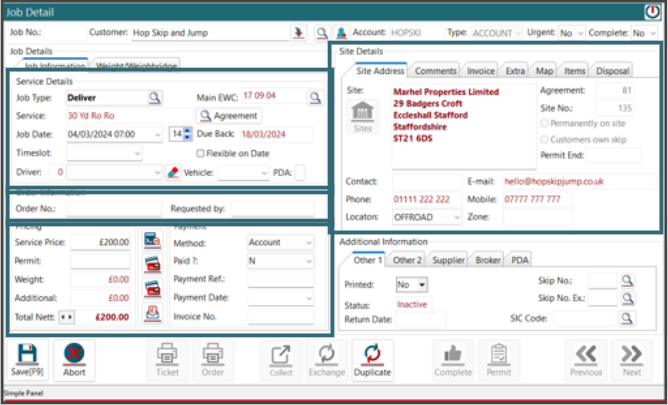
• The “Job Details” page will then be displayed. Here you will be able to configure the Job Details for the customer’s request.
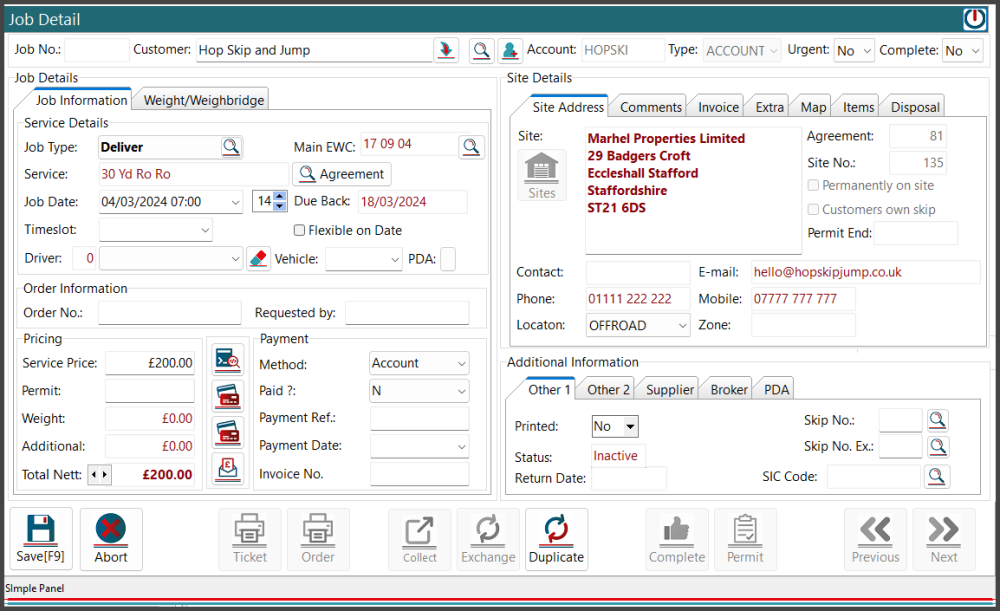
I will now explain the sections on this page.
• The Service Details section is where you can alter the job date, when the service is due back, a preferred time and you can also allocate a driver and vehicle.
• The Order Information section, you can add in an order number if required and also who the job has been requested by.
• The Pricing section you can change the pricing for this job and you can also change the method of payment and mark the job paid for.
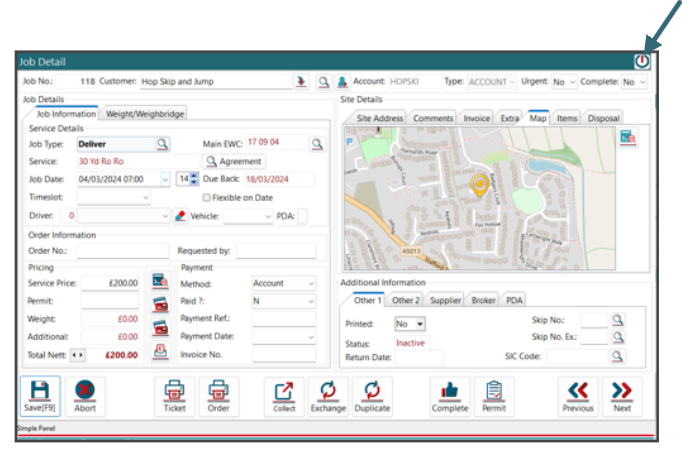
• Site Details is the information where the service is going to be provided at. I will now explain the site details tabs.
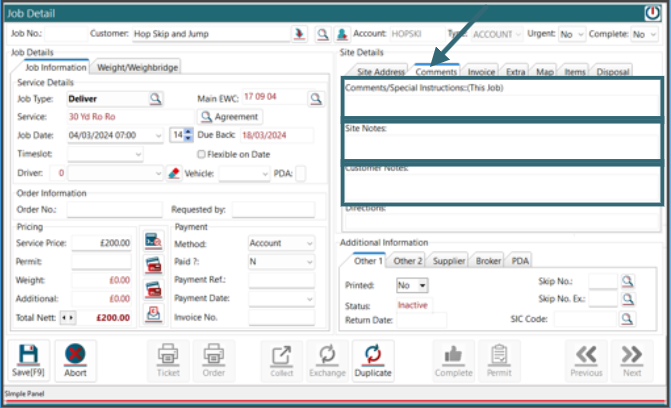
• The “Comments” tab is where you can add notes, for the job only, the site, and notes regarding the customer.
• The “invoice” tab is information on where the invoice is going to be sent to.
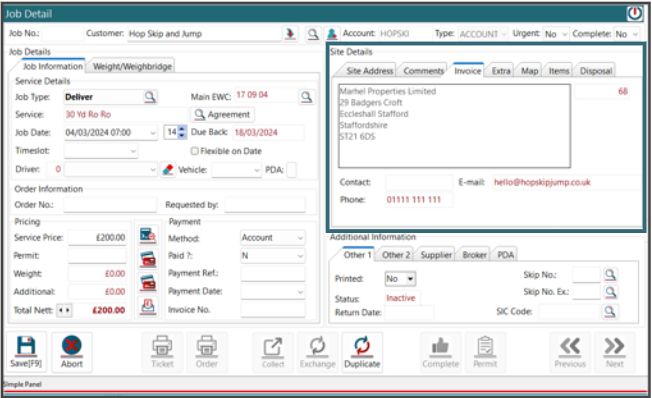
• The “Map” tab will show you a small map of the location of the job using the address that has been provided. When you are happy with the job detail Click on the “Save” Button.

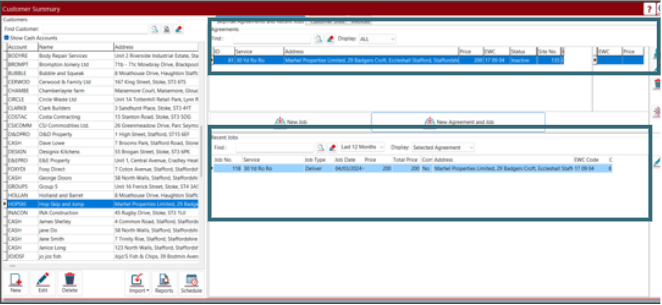
• You will then need to close the “Job Detail” window by clicking on the close icon.
• You can now see on the “Customers Summary” page the “Agreement” and the “Job” have been created.
Post your comment on this topic.